You may want to host a website, with your own domain name, because it gives you increased freedom over how you publish and monetise your content. There's a resurgence of interest in the self-hosted approach as the centralised tech platforms offer less and less value to small content creators.
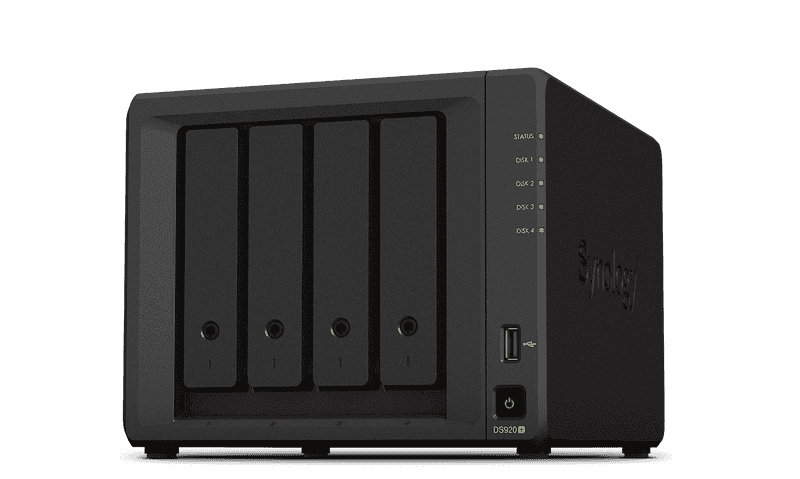
You can get your own domain name and create a site with a service such as wordpress.com, but you can take it one step further by hosting the site on your own hardware, such as a Synology NAS. This site, for example, is running on a Synology DS920+.
I chose the DS920+ because I want reasonably high uptime. The DS920+ supports multiple RAID configurations and can sustain a failure on up to two of the four hard drives without data loss. I also have a UPS which keeps the NAS and the router alive during power failures. I live in Tasmania, which is subject to constant power outages. The UPS eliminates website downtime during shorter power failures, and it reduces downtime during those that last longer.
The site itself is developed using React. The NAS is also good at serving other types of sites, such as Wordpress, but I don't much care for PHP, and I wanted to have full creative control over the site. This is why I chose to develop using React. There's no backend, I write these blogs in Markdown, and use gatsby-transformer-remark to render them. But you can, of course, do it in any way that takes your fancy.
The NAS makes it easy to serve a JS based website like this one. What follows is a guide on how to get a simple website up and running.
How to Configure the Synology NAS
Go to Package Center on the NAS, and install Web Station. This will automatically create a directory named "web".
Create a subdirectory under "web", so that you can host multiple sites, and name it whatever you like.
Add your website files to the new directory. i.e. The files generated by running npm run build if it's a node.js project.
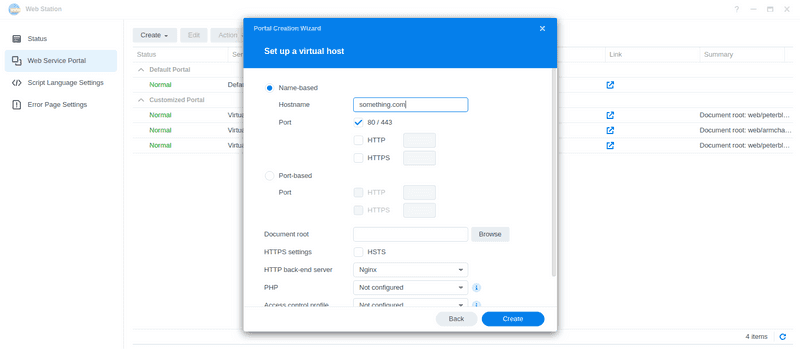
Open Web Station on the NAS and select "Web Service Portal".
Click the "Create" button.
Select "Create service portal" from the dropdown.
Select "Virtual Host" as the portal type.
Select the "Name-based" radio button.
Enter your hostname (e.g. something.com)
Check the box against Port 80/443.
Select "Nginx" as the HTTP back-end server. Note: The Synology NAS comes with Nginx installed by default.
Take the defaults on all other options.
You'll probably want a digital certificate for SEO and security. You can get certificates for free at Let's Encrypt, which isn't a bad deal. Follow Synology's instructions to get, and install, a certificate. Note: You'll need to register your domain name before you can get the certificate. Choose any registrar that you like with which to register your domain name.
Having purchased and installed your certificate, go to Control Panel on the NAS and select "Security".
Click on the "Certificate" tab.
Select the "Settings" tab.
Select your certificate from the dropdown against the entry for your website.
And that's all you need to do to configure the NAS to host your website. Web Station handles the rest.
You'll also need to make a few config changes to your router before your site will be public on the internet:
Configuring Your Router
Your configuration will depend on your particular router, but the steps are roughly as follows:
Change the default port of your router from 80 to something else. You want port 80 to forward to your website.
Set a static IP address for the NAS so that DHCP doesn't change it on you.
Enable port forwarding on ports 80 and 443, and forward to the static IP address of the NAS.
Note: Some ISPs block port 80 and 443 by default, so you may need to call your ISP and ask them to open the ports. You'll also need a static IP address for your router, so ask your ISP for one of those while you're at it (if you don't already have one).
Go back to your domain registrar and create a record pointing to the static IP address provided by your ISP.
Your website should now be on the internet. DNS will send requests to your router, which will forward them to the NAS.
And that's it! I hope it works for you, and that you enjoy being master of your own domain ;-)

